Configure Load Balancing
This guide provides a step-by-step approach to deploying Bagisto on AWS with an Application Load Balancer (ALB) for improved scalability and high availability. By setting up a dedicated database server, integrating Amazon S3 for media storage, and configuring an AMI-based auto-scaling setup, you can ensure that Bagisto can handle increased traffic efficiently.
What You'll Build
- Dedicated MySQL server for better performance
- Bagisto on multiple EC2 instances behind a Load Balancer
- Amazon S3 for storage instead of local file storage
- AMI to easily scale new instances
- Application Load Balancer (ALB) for traffic distribution
- SSL and domain configuration for secure access
This setup ensures a scalable, fault-tolerant, and high-performance Bagisto application.
Bagisto with ALB Setup on AWS
Dedicated Database Server Setup
Launch EC2 Instance for MySQL Database
- Launch an EC2 instance for MySQL database
- Assign an Elastic IP to the EC2 instance
Install and Configure MySQL Server
SSH into the EC2 instance and update the system:
sudo apt-get updateInstall MySQL server:
sudo apt-get install mysql-serverSecure the MySQL installation and create the database:
sudo mysql -u root -p
CREATE DATABASE bagistodb;
CREATE USER 'bagistouser'@'localhost' IDENTIFIED BY '<your-db-password>';
GRANT ALL ON bagistodb.* TO 'bagistouser'@'localhost' WITH GRANT OPTION;
SET GLOBAL log_bin_trust_function_creators = 1;
FLUSH PRIVILEGES;
EXIT;
Update MySQL Bind Address
Modify the bind address from 127.0.0.1 to 0.0.0.0 in /etc/mysql/mysql.conf.d/mysqld.cnf.
Restart MySQL Server
Restart the MySQL service:
sudo systemctl restart mysqlOpen MySQL Port (3306) in Security Group
Modify the security group for this EC2 instance to allow inbound traffic on port 3306.
Verify Database Connectivity
Test connectivity using:
telnet <EC2-ip> 3306S3 Bucket Configuration for Bagisto
Create S3 Bucket
Follow the documentation S3 Bucket and Policy Setup for Bagisto to create an S3 bucket.
Configure IAM Role for S3 Access
Create an IAM role with the required permissions to allow Bagisto to interact with S3. Use the Access Key ID, Secret Key, Bucket Name, Region, and Bucket URL.
Bagisto Server Setup
Launch EC2 Instance for Bagisto Application
Launch a new EC2 instance for the Bagisto application.
Install MySQL Client
SSH into the EC2 instance and install the MySQL client:
sudo apt-get install mysql-client-8.0Install Bagisto
Follow the steps from the Bagisto setup guide on AWS but skip step 7 (Install MySQL Server) as it is already done in the dedicated DB server.
Use the latest composer commands.
Configure Bagisto Database Connection
Use the following database details:
DB_HOST=<public IP of dedicated DB server>
DB_DATABASE=bagistodb
DB_USERNAME=bagistouser
DB_PASSWORD=<your-db-password>// If configuring manually
Host: <public IP of dedicated DB server>
User: bagistouser
Dbname: bagistodb
Password: <your-db-password>Install S3 Integration Module
Install and configure the S3 module for Bagisto using the IAM credentials.
Access Bagisto Admin Panel
Visit the admin panel at: http://<this-ec2-public-ip>/admin to complete configurations.
Create AMI for Bagisto Application
Create AMI from Bagisto EC2 Instance
Go to Instances > Actions > Image and templates > Create Image.
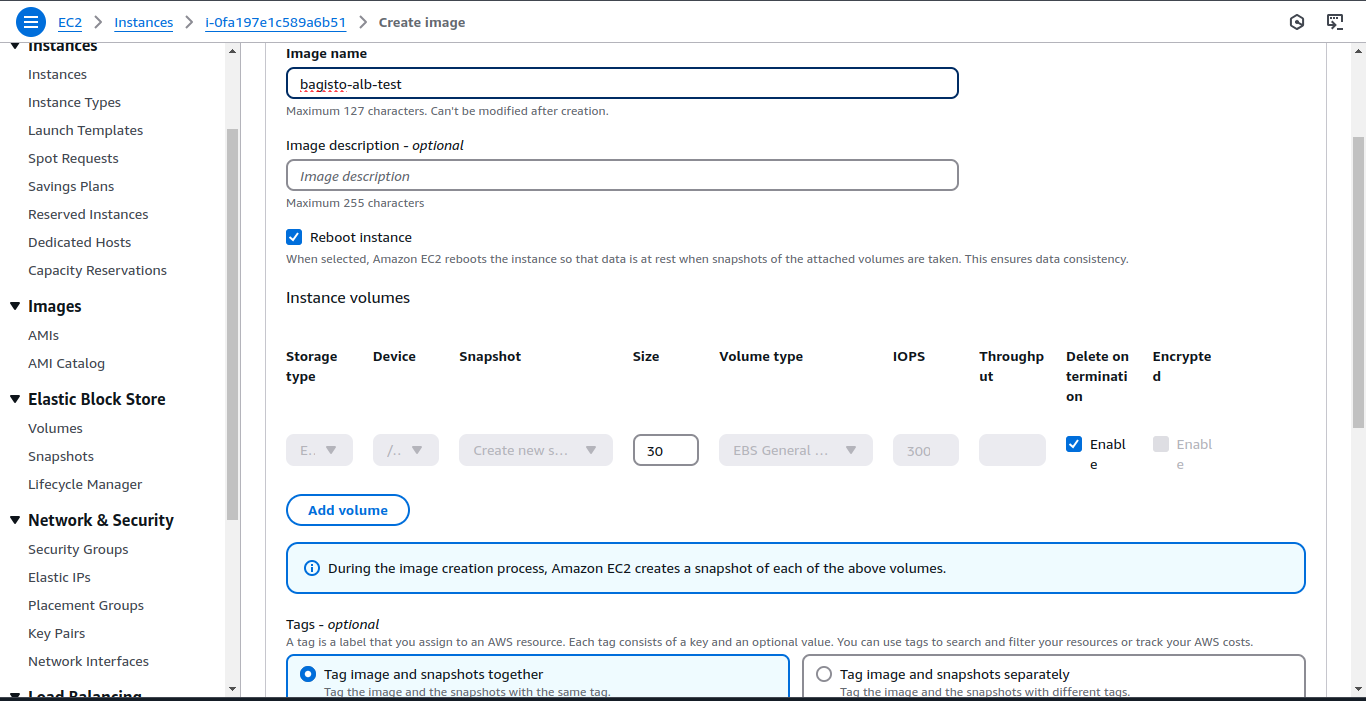
Enter the image name and click Create Image.
Wait for AMI to Be Available
Monitor the status of the AMI in the AMI section.
Launch Instances from AMI
Once the AMI is available, go to AMIs and launch as many instances as required in the target group.
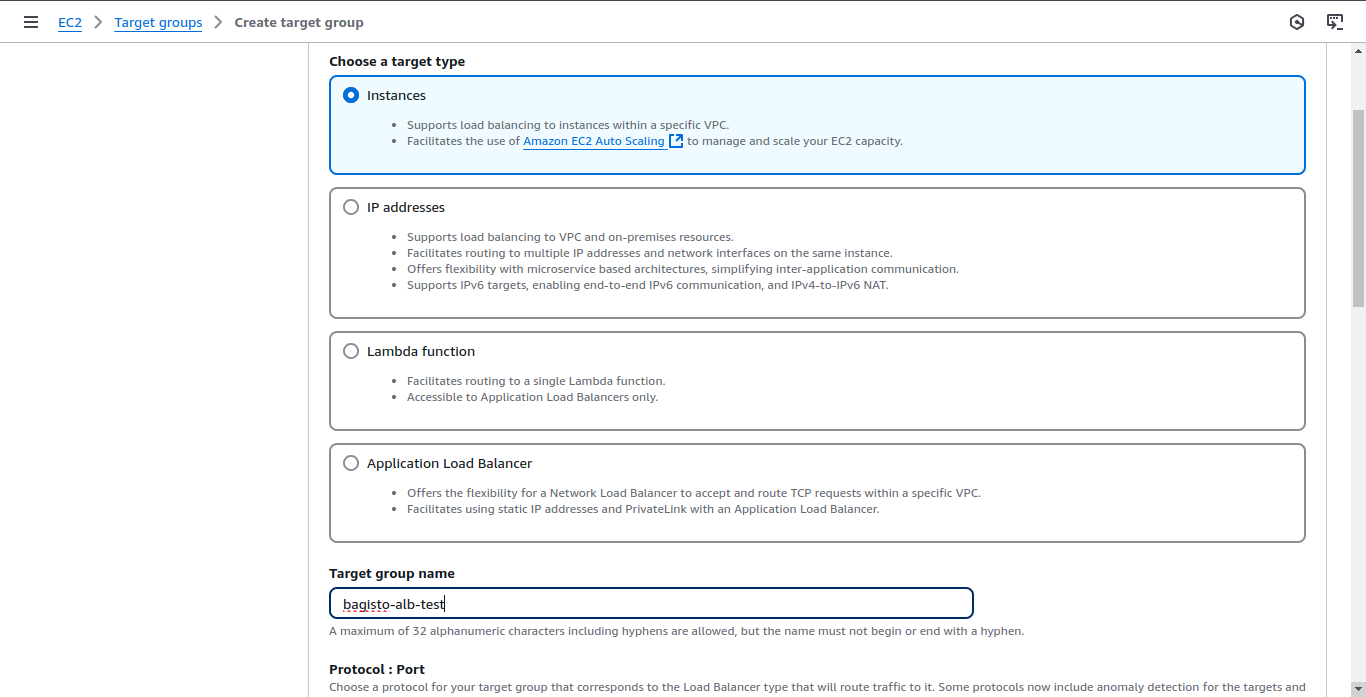
Configure Target Group
Create Target Group
Go to Target Groups and click Create Target Group. Choose Instances as the target type and give it a name.
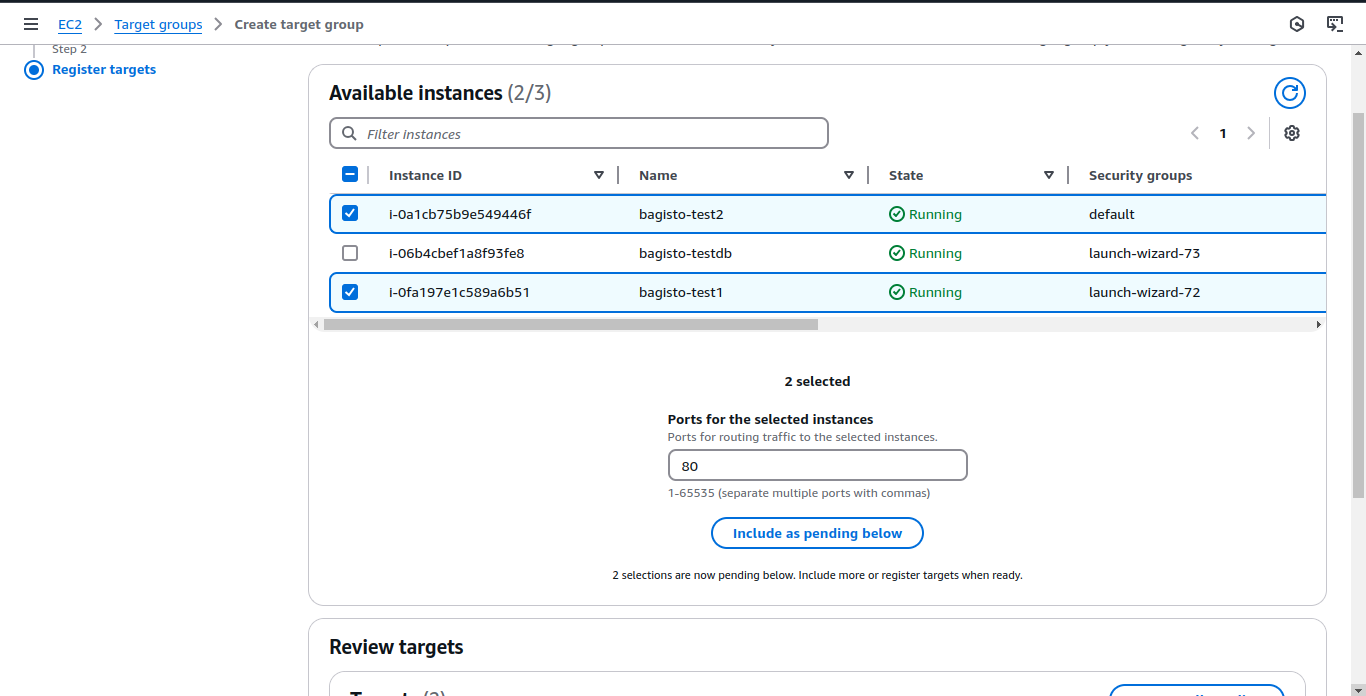
Register Instances in the Target Group
Choose the instances to be added to the target group:
Configure Load Balancing Algorithm
After creating the target group, go to Attributes and choose the desired load-balancing algorithm (default: round-robin). Enable stickiness.
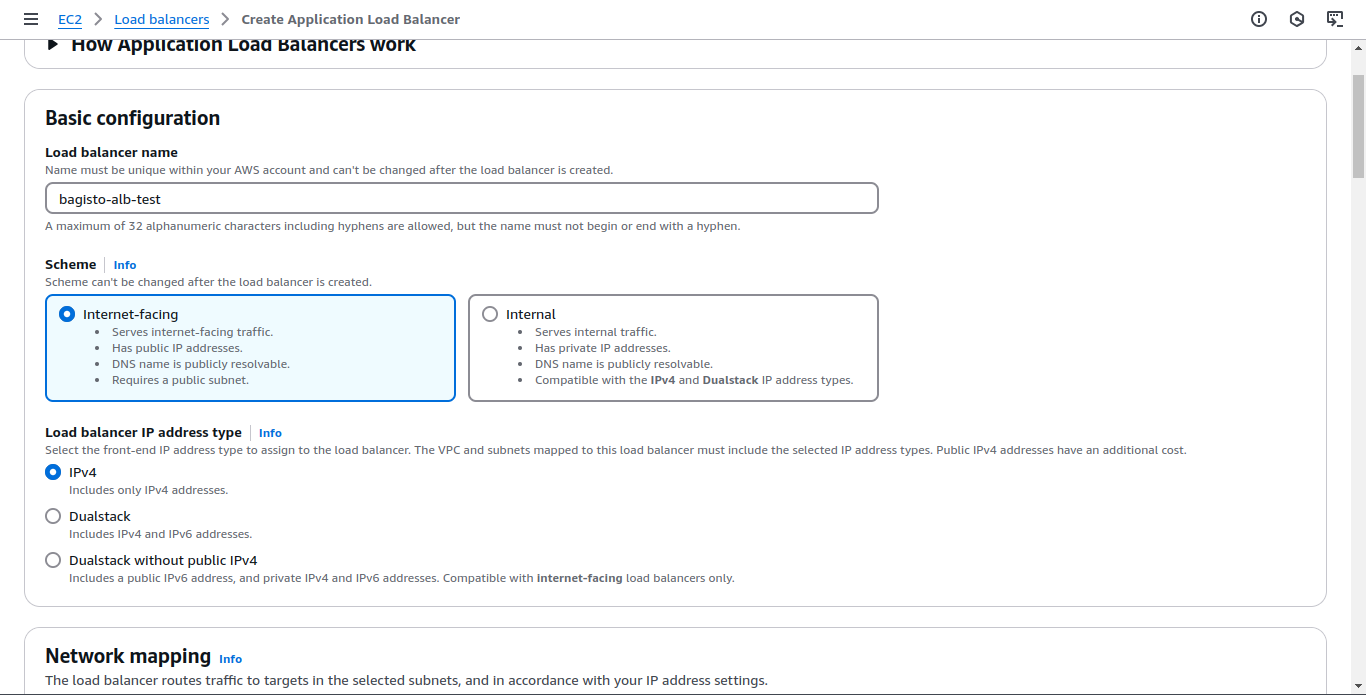
Create and Configure Application Load Balancer (ALB)
Create ALB
Go to Load Balancers and click Create Load Balancer.
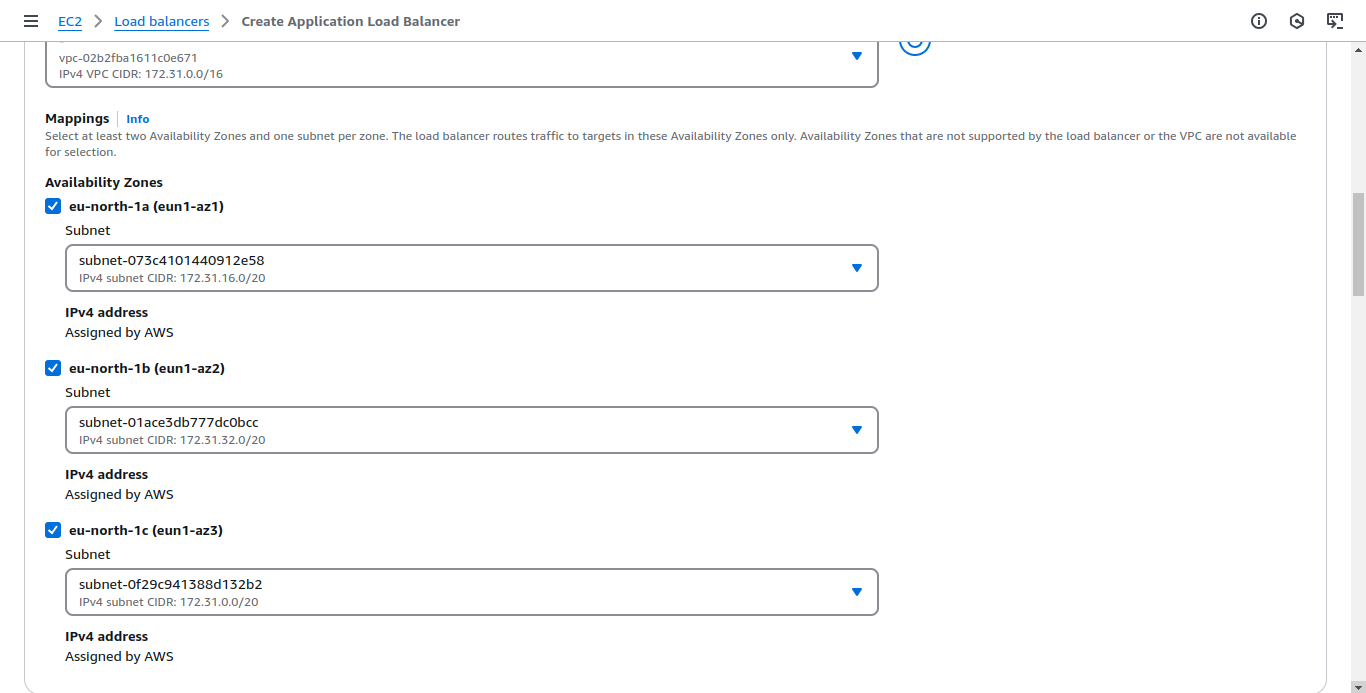
Choose Application Load Balancer and provide the following configurations:
- Internet-facing
- Select all Availability Zones
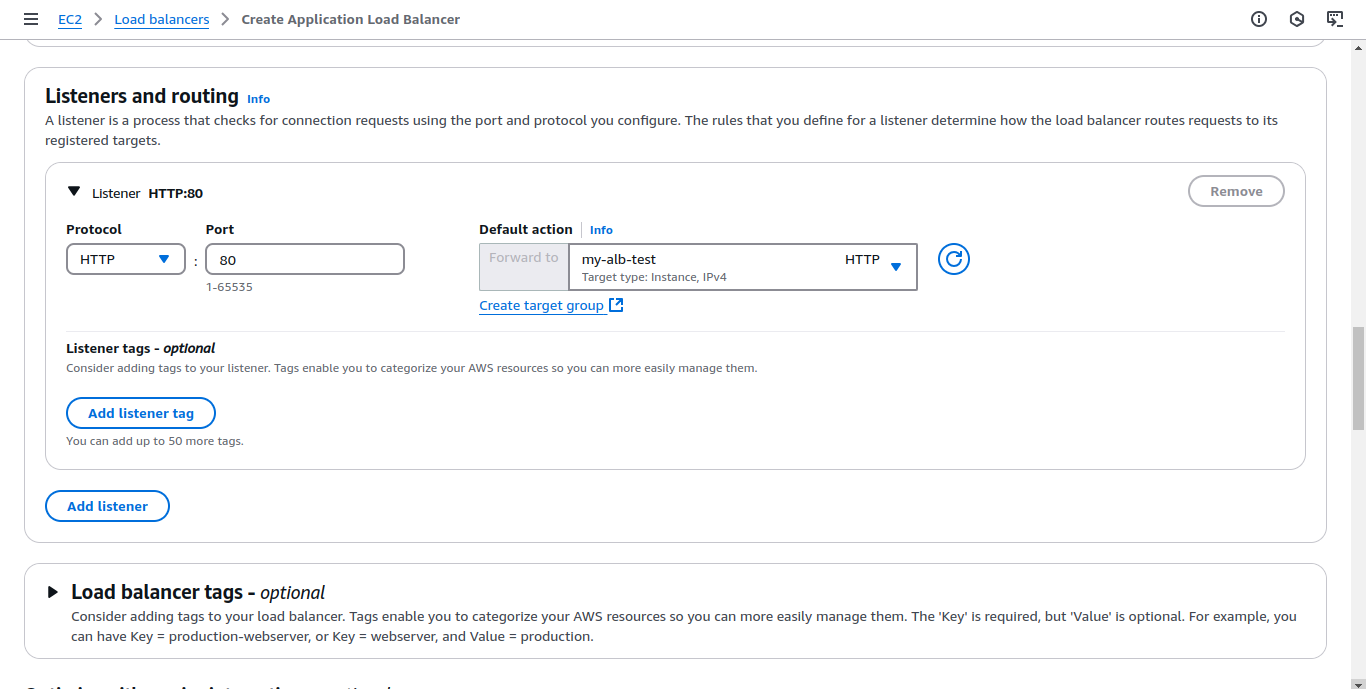
- Choose the target group created earlier and configure the listener on port 80 (HTTP)
Adjust Security Groups
Modify the security groups to allow necessary traffic (e.g., HTTP/HTTPS).
Verify Load Balancer Configuration
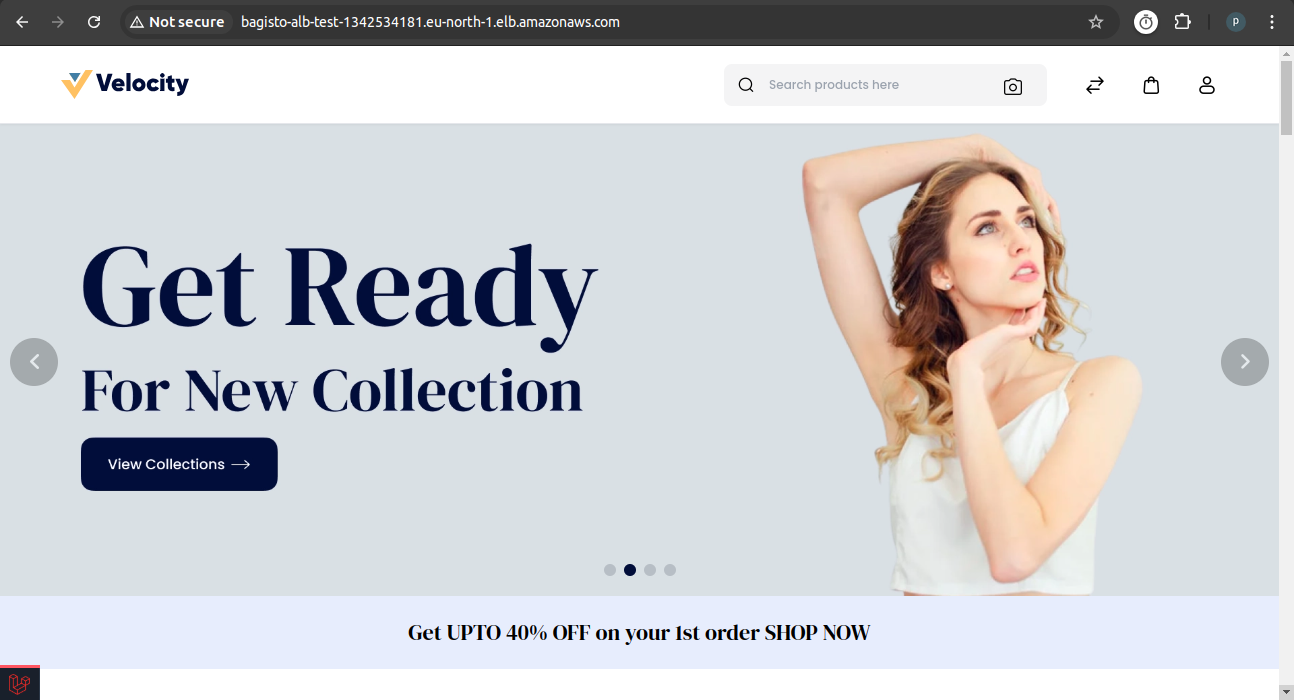
- Copy the DNS name of the load balancer and verify it
- Configure the domain name (CNAME) to point to this load balancer DNS for production use
Set Up SSL on Load Balancer
Configure the ALB listener to use HTTPS (port 443), ensuring that an SSL certificate is installed.
Verify and Test the Entire Setup
Test Load Balancer
Confirm that the load balancer is distributing traffic across the registered instances.
Verify Domain Configuration
Ensure the domain is resolving correctly to the load balancer.
Test Bagisto Functionality
Access the Bagisto application and verify that:
- S3 integration is working
- Application can connect to the MySQL database
- All features are functional
Success
Bagisto with ALB Setup on AWS is Successfully Configured!
The Bagisto application is now running behind an Application Load Balancer (ALB) with a dedicated MySQL database and S3 integration for storage. The load balancer is efficiently distributing traffic across multiple instances, ensuring high availability and scalability.